![]()
Click the logo to add
this site to your Favourites
Search:
Quick Links
Subscribe to my Newsletter
Books presented in association with:

Your Free E-Mail
Account:
Send me mail!
![]()
Using Textures
in Paint Shop Pro
Yet another very frequently used effect in stationery is that of adding a texture.
Whether it be using a texture as a background or texturizing an existing image,
this effect is very simple to achieve and can produce some stunning results.
Part 1: Creating a Textured Background
 Using
just the features features built into Paint Shop Pro 5, you can easily create a textured
background for use in your stationery.
Using
just the features features built into Paint Shop Pro 5, you can easily create a textured
background for use in your stationery.
Please note that creating a texture is not an exact science. While this tutorial contains the general methodology you should employ, you may wish to vary the steps and play around a bit in order to achieve the results you desire.
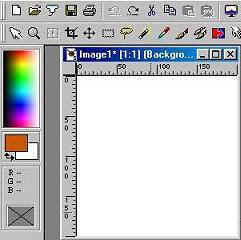
The first thing to do is click on the New button to create a new image. Remember to size it appropriately for all monitors by giving it a width of 1024 pixels by however high you like.
Now choose a colour to use for the texture by clicking on a dark colour on the colour palette. Be sure to leave the background set to white.
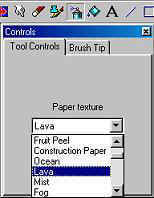 With
the texture colour chosen, click on the Airbrush tool. Consult the Control Palette
to choose the texture you wish to use. You'll note that PSP 5 has quite a few
textures built into it. You can see samples of all the different textures available
to you at the bottom of this page.
With
the texture colour chosen, click on the Airbrush tool. Consult the Control Palette
to choose the texture you wish to use. You'll note that PSP 5 has quite a few
textures built into it. You can see samples of all the different textures available
to you at the bottom of this page.
Once you have chosen a texture to use, start spraying it onto your image until you achieve the texture density that you desire. You may wish to play around with different spraying techniques and brush tip sizes during this step to achieve the effect you want.
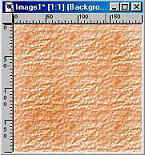 When you
are finished spraying, you should end up with something similar to the example at right.
When you
are finished spraying, you should end up with something similar to the example at right.
Part 2: Texturizing an Image
Now that you know how to make a textured background, it's time to go a step further and add a texture to an existing image.
The first thing to do is open the image you wish to texturize. Now you need to add a new layer. It is to this layer that the texture will be added. Click on the Add Layer button in the Layers Palette. Before going any further, ensure that the newly created layer is the active layer (it should be depressed in the Layer Palette).
Select a colour to use for the texture. Since you want to be able to see the image through the texture, this should generally be white or another rather light shade. On the Control Palette select the texture you wish to use. With the colour and texture selected, use the Airbrush tool and spray the texture over your image on the new layer.
It may look odd at first. Once you have finished spraying, you can adjust the opacity of the texture by moving the slider bar for this layer on the Layer Palette until you achieve the desired level of transparency.
When you are finished adjusting everything, you need to combine the two layers into one: Layers | Merge | Merge All (Flatten).
For a quick overview of this entire process, consult the screen shot below.

Part 3: Texture Samples
As mentioned above, Paint Shop Pro 5 comes with many built in textures. Consult the chart below to see what the included textures look like.
 Asphalt |
 Canvas |
 Clouds |
 Construction Paper |
 Coarse Canvas |
 Dark Weave |
 Daze |
 Dither 25% |
 Dither 50% |
 Dither 75% |
 Fine Canvas |
 Fog |
 Fruit Peel |
 Grid |
 Large Bricks |
 Lava |
 Letters |
 Lines |
 Lunar |
 Marble |
 Marsh |
 Medium Bricks |
 Mist |
 Ocean |
 Parchment |
 Polka Dot |
 Sidewalk |
 Small Bricks |
 Spheres |
 Weave |
 Woodgrain |
![]()